Setting up LYNX after rebranding
This article serves as a setup guide for your rebranded Cake bike to LYNX.
siliXcon does not have oportunity to test these settings on all bike versions. The settings are based on the experience with the Cake bikes. You may need to adjust the settings indicidually.
Introduction
If you have not worked with siliXcon hardware or software before, consider following this guide step by step to not miss any important information.
You need to install the newwst SWTools version. It is necessary for all subsequent steps. There are several tutorials to help you get familiar with the tools.
Installation of the LYNX and LYNX-front firmware
The Cake bikes have display and controller. You need to install firmware on both of them. For installation and future upgrades use SRM tool which is included in SWTools. This guide will help you get familiar with SRM and to connect to the controller and display.
If you encounter any problem during installation, check this article.
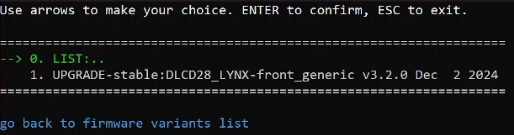
Display
Connect to the display and launch the SRM tool. Install the stable version of the firmware.
Controller
Connect to the display and launch the SRM tool for nightly build installation (srm LIST-nightly).
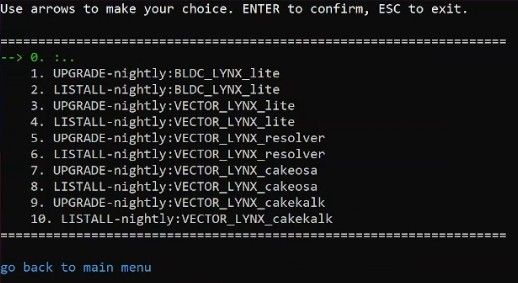
Install firmware modification with SWID according to your battery type.
| SWID | Battery type |
|---|---|
VECTOR_LYNX_cakeosa | For battery with CAN communnication. (Gen1 or Gen2) |
VECTOR_LYNX_cakekalk | For battery with thermistor connected to GPIO3 of the controller |
Setting up LYNX parameters
Display
You can find detailed guide how to setup the diplay firmware here.
Parameter /options changes map switch button from external button to button 2 on the display.
You will need this, if your bike does not have an external button. Otherwise you can leave the default value unchanged.
"/options" : "2"
Controller: Battery
You need to set a few parameters listed below based on your battery type.
- Battery with CAN communication
- Battery with thermistor connected to GPIO3
Set the /bms/bms_type parameter based on generation of BMS (Battery management system) in your battery.
/bms/bms_type | Description |
|---|---|
| 60 | Gen1 BMS. Used only with SL controller. |
| 61 | Gen2 BMS. Used with SX controller. (CR models) |
"/driver/limiter/bcellgain" : "0.100000"
"/driver/limiter/bcellmax" : "4.25"
"/driver/limiter/bcellmin" : "2.95000"
"/driver/limiter/btempmaxhi" : "60.0"
"/driver/limiter/btempmaxlo" : "47.0"
"/driver/limiter/btempminhi" : "-20.0"
"/driver/limiter/btempminlo" : "-5.0"
"/driver/limiter/ibgain" : "2.0"
"/driver/limiter/ibneg" : "-15.0"
"/driver/limiter/ibpos" : "150.0"
"/driver/limiter/ubgain" : "0.100000"
"/driver/limiter/ubmax" : "59.0"
"/driver/limiter/ubmin" : "44.0"
"/driver/limiter/btempmaxhi" : "3897.0"
"/driver/limiter/btempmaxlo" : "3627.0"
"/driver/limiter/btempminhi" : "2052"
"/driver/limiter/btempminlo" : "2445"
"/driver/limiter/ibgain" : "2.0"
"/driver/limiter/ibneg" : "-15.0"
"/driver/limiter/ibpos" : "150.0"
"/driver/limiter/ubgain" : "0.100000"
"/driver/limiter/ubmax" : "59.0"
"/driver/limiter/ubmin" : "44.0"
"/io/IN_btemp" : "11.0"           # Set btemp input to GPIO3
"/common/ioconf3" : "0"         # Set GPIO3 as floating input
Controller: Other parameters
Now you need to set other parameters according to the LYNX guide. Many parameter values shown in the LYNX guide might not work out of box for every bike. In this guide, we will list parameters we tested on our Cake Osa. They are a good starting point but you might need to tweak them to your needs.
Throttle
Disable motor power before accelerator configuration to prevent unexpected motor activation.
Use stop command to disable motor until next power cycle.
It is recommended to set up end stop switch to prevent accidents caused by a loose wire in the throttle.
Now you need to set up throttle range. Set throttle to 0 % and set /acc/asc/min to /acc/asc/in value. Set throttle to 100 % and set /acc/asc/max to /acc/asc/in value.
Activate end stop switch by setting /acc/dual_err to -1.0, /io/IN_acc_2 to 17
and /common/ioconf1 to 1.
Detailed explanation here.
"/acc/asc/max" : "4836"
"/acc/asc/min" : "0"
"/acc/dual_err" : "-1.0"

"/io/IN_acc_2" : "17,0"

"/common/ioconf1" : "1"
Motor
The motor settings are crucial for the proper operation of the controller.
Always do motor identification (identrun) after changing the motor settings.
Driver configuration guide can be found here.
"/driver/dac/dxc" : "0.700000"
"/driver/dac/fwc" : "0.850000"
"/driver/dac/fwd" : "10.0"
"/driver/dac/fwm" : "0.800000"
"/driver/dac/fwr" : "0.700000"
"/driver/dac/mtk" : "0.100000"
"/driver/dac/tcc" : "0.200000"
"/driver/dac/tdg" : "0.005000"
"/driver/dac/tqf" : "0.0"
"/driver/motor/Da" : "0.012675"
"/driver/motor/Dc" : "0.005147"
"/driver/motor/Dp" : "0.0"
"/driver/motor/Dt" : "0.0"
"/driver/motor/Ld" : "6.70000e-5"
"/driver/motor/Lq" : "0.000131"
"/driver/motor/pp" : "4"
"/driver/motor/psi" : "0.021130"
"/driver/motor/Rt" : "0.006369"
"/driver/pid_id/I" : "150.0"
"/driver/pid_id/P" : "0.300000"
"/driver/pid_iq/I" : "150.0"
"/driver/pid_iq/P" : "0.300000"

"/driver/rest/eak" : "0.010000"
"/driver/rest/eca" : "0.785398"
"/driver/rest/ect" : "0.100000"
"/driver/rest/edc" : "0.0"
"/driver/rest/esk" : "0.010000"

"/driver/rest/omega" : "314.159"
"/driver/rest/rangle" : "-0.482500"
"/driver/rest/roff1" : "1602.0"
"/driver/rest/roff2" : "1602.0"
"/driver/rest/rpole" : "4.0"
"/driver/prest" : "3"
"/driver/ipeak" : "500"   # This is for SL controller, for SX you need to set iref 350 and ipeak 400.
"/driver/iref" : "400"
"/driver/vcf" : "2"

"/driver/limiter/mtempgain" : "0.100000"
"/driver/limiter/mtemphi" : "1520.0"
"/driver/limiter/mtemplo" : "1400.0"

"/driver/limiter/ppos" : "1000.0"

"/driver/limiter/rdec" : "100.0"
"/driver/limiter/rgain" : "50.0"
"/driver/limiter/rneg" : "-712.5"
"/driver/limiter/rpos" : "712.5"
Speed and distance measurement
- Cake Osa
- Cake MODkalkand
- Cake MODkalkW
- Other models
"/gearthr" : "5.0"          # Motor shaft revolutions per wheel revolution
"/odothr" : "570.0"         # Number of wheel revolutions per kilometer
"/gearthr" : "6.0"          # Motor shaft revolutions per wheel revolution
"/odothr" : "460.0"         # Number of wheel revolutions per kilometer
"/gearthr" : "6.0"          # Motor shaft revolutions per wheel revolution
"/odothr" : "475.0"         # Number of wheel revolutions per kilometer
"/gearthr" : "7.0"          # Motor shaft revolutions per wheel revolution
"/odothr" : "510.0"         # Number of wheel revolutions per kilometer
If /gearthr and /odothr remain at default values, speed readings will be in [motor RPM]. Consequently, the speed limit kph in maps will also be in [motor RPM].
Detailed explanation here.
Maps
Maps are something like gears in vehicles with combustion engine. You will set limits to various parameters to make the bike act similarly.
Zero value means no limit is set.
For functioning kph limit /odothr, /gearthr and /driver/motor/pp need to be set correctly.
Detailed explanation here.
"/maps/map0/kph" : "45.0"       # Initial map

"/maps/map1/kph" : "15.0"       # Speed limit in kph
"/maps/map1/pwr" : "1000.0"     # Power limit in W
"/maps/map1/trqlvl" : "0.5"     # Current multiplier

"/maps/map2/kph" : "40.0"
"/maps/map2/pwr" : "3000.0"
"/maps/map3/kph" : "60.0"

"/maps/map3/paslvl" : "0.0"
"/maps/map3/pwr" : "7000.0"
"/maps/map3/trqlvl" : "1.0"

"/maps/kphlimit" : "70.0"       # Global speed limit for maps
Setting up scripts for lights
You can create a permanent script for turning on lighsts on each bike's power on.
Connect to the controller, lauch term and log in.
Type this into the term to create the script:
script

cont 1 1
cont 2 1
cont 3 1

quit
You can also create scripts runnable in term. You can use them for example when tuning parameters to save battery.
Press Alt+F1 to create a power on script and paste this code inside.
cont 1 1
cont 2 1
cont 3 1
Press Alt+F2 to create a power off script and paste this code inside.
cont 1 0
cont 2 0
cont 3 0
You can run these scripts by pressing F1 or F2 in term.
You can find more information about scripts in this guide.