Kvaser BlackBird setup
To start configuring the Kvaser BlackBird device, make sure you have installed the Kvaser CANLIB SDK and tools. They should be installed with SWTools. You can download it from the Kvaser website.
WiFi setup
The BlackBird only works on 2.4GHz WiFi networks. The wifi card in you PC needs to be configured to use 2.4GHz only.
- Open the Device Manager (Win + X -> Device Manager).
- Find your WiFi adapter under
Network adapters(eg. Intel(R) Wi-Fi 6E AX210 160MHz). - Double-click on it.
- Go to the
Advancedtab. - Look for an option like
Preferred Band,Band, orWireless Mode.- Set
Preferred Bandto2.4GHzor2.4GHz only. - For
Wireless Modeor802.11 Modepick a mode that does not mention “a” or “ac/ax” (since those are 5 GHz). Stick with b/g/n.
- Set
Device configuration
- Connect the BlackBird to your PC using a USB cable.
- Open the Kvaser Device Guide (by searching for it in the Start menu).
- Right-click on the BlackBird device from the list and select
Pair via Wi-Fi.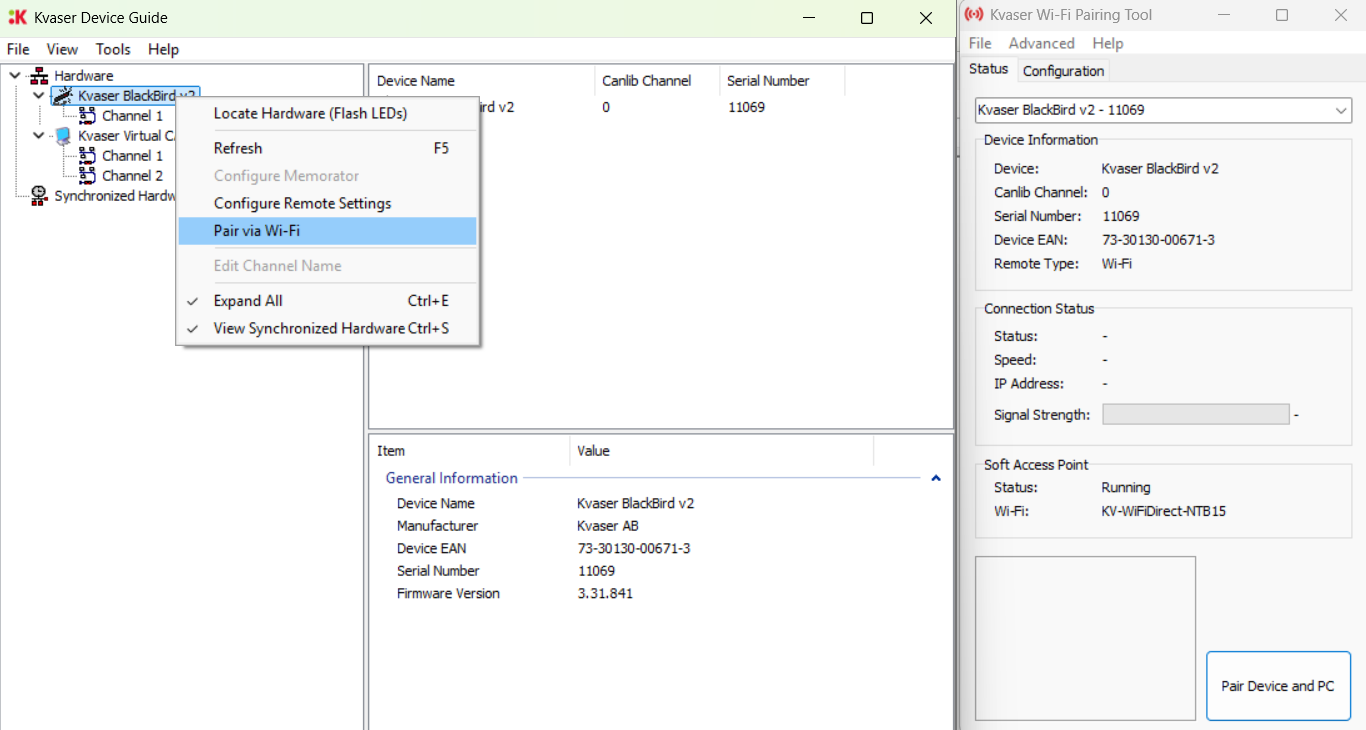
- Make sure you have Kvaser BlackBird selected as the device on the top.
- Go to the
Configurationtab. - Enable
Force use of Hosted NetworkinAdvanced Settings. - Go back to the
Statustab and click onPair Device and PC. This will create a WiFi network named on you PC that the BlackBird will connect to. - If you disconnect the BlackBird from USB and turn on power on CAN, it should connect automatically to your PC (it will say (Remote)).
- You can check the connection strength by right-clicking the BlackBird device in the list and selecting
Configure Remote Settings.
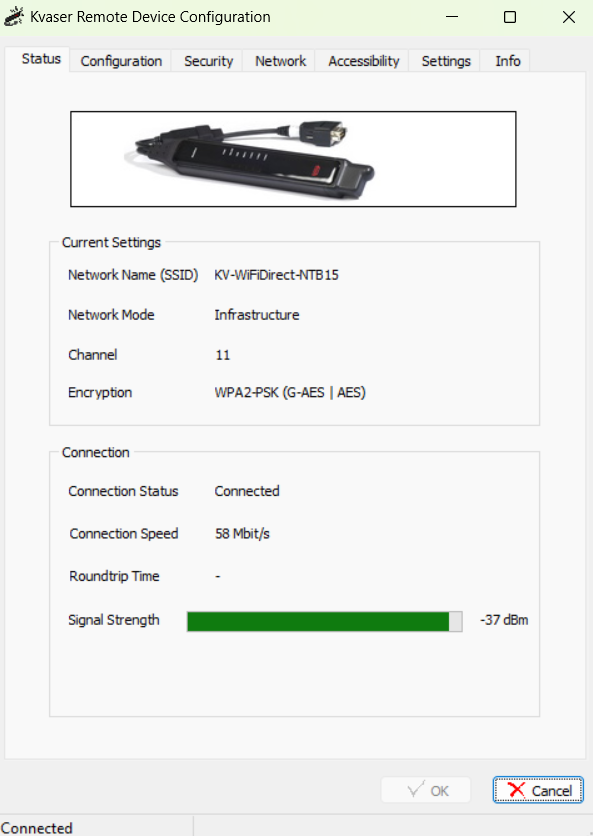
- In the
Configurationtab, make sure you are using Operation Mode:Infrastructure.